
Basic Climbing Equipment
Now that you know a little bit about two of the types of climbing here at Push, let’s discuss a bit more about the different types of gear that you will need for the Auto-belay and Bouldering sections in the gym.
EQUIPMENT FOR BOULDERING
You might have noticed that the bouldering section of the gym has a very soft surface under the wall for protecting falling climbers. With this kind of safety equipment (called a “crash pad”) already in place, the only thing you need to walk up and climb is a good pair of “climbing shoes” and a “chalk bag.”
Climbing Shoes
Can’t I just climb in my tennis shoes? Well, you could…but you’ll probably slip off the wall pretty easily. Rock climbing shoes are made to feel a little bit tighter in the toes, and with a sticky rubber sole that will help your feet stick to the wall. Some more advanced climbers even have multiple pairs of shoes for different types of rock they are climbing! Here’s what they look like:
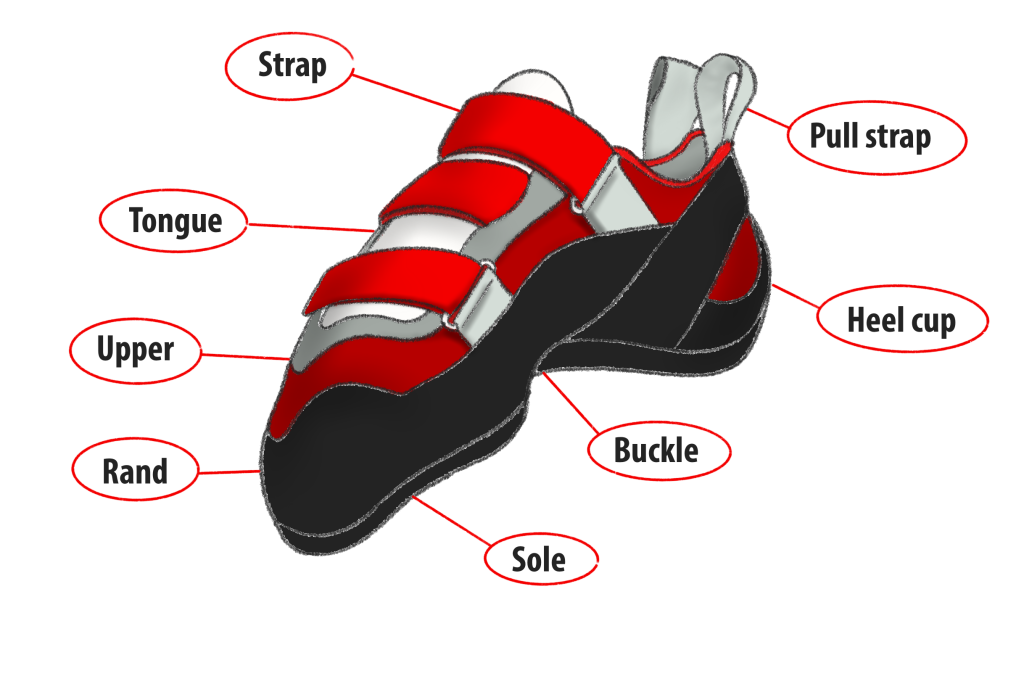
How to Fit Climbing Shoes:
Properly fitting climbing shoes should keep your toes snug and able to work as a single unit.
1. The first step Is to undo the Velcro straps and open the shoe with your hands.
2. Then insert the front of your foot as far forward as possible, if your toes touch the end is normal.
3. Once you inserted the front, pull on the two straps located at the back end of the shoe while pushing downwards with your heel.
4. If the shoe fits properly, your toes should be slightly squeezed and no empty space should remain at the back of the shoe.
Tip: With climbing shoes Pain doesn’t always Gain. A comfy it is 100% more effective than over-tight and uncomfortable shoes.
EQUIPMENT FOR USING AUTO-BELAY
Similar to bouldering, rock climbing shoes and chalk are used for the auto-belays as well. In addition, here are a few pieces of gear that you’ll need for top-roping that were not necessary for bouldering.
Harness
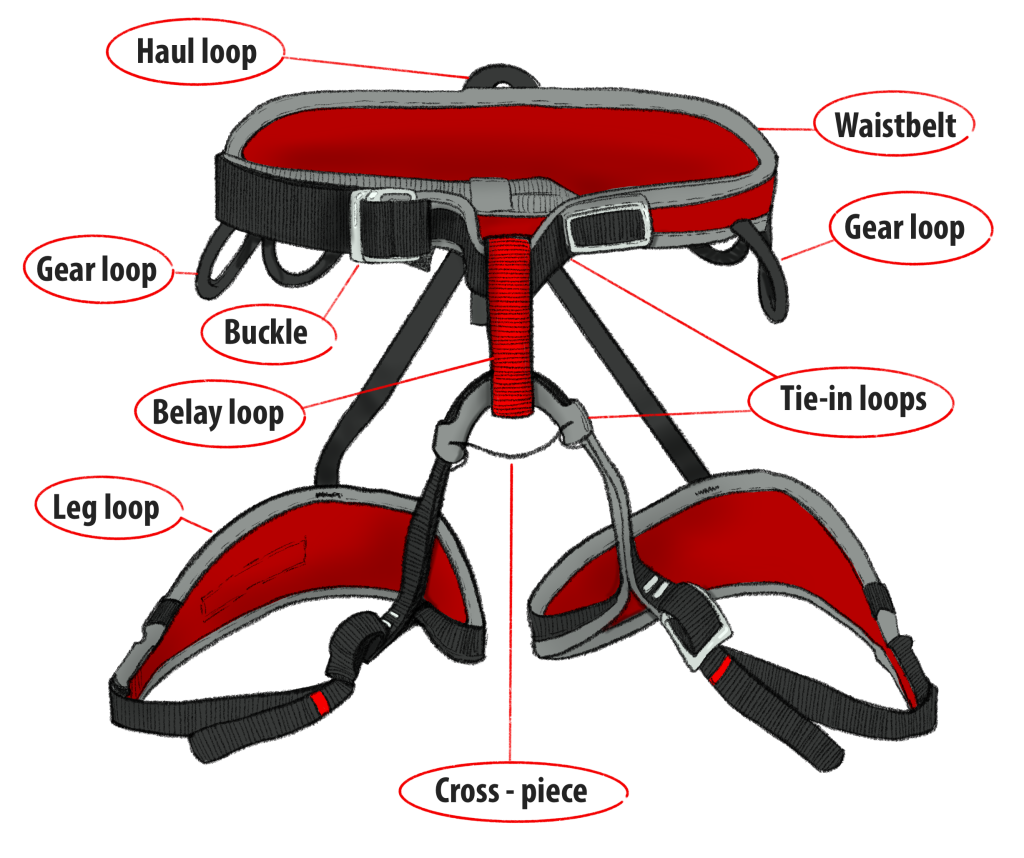
The harnesses you’ll see here in the gym basically fall under two main types. Both are equally as safe, as long as:
a) you follow the manufacturer’s instructions for use
b) there is no damage done to the harness
How To Fit Climbing Harness:
- We start by making sure the red belay loop is in front of us and then we proceed to pass both of our legs thru the leg loops.
- Once each leg is passed thru their respective loop, we pull the harness upwards until the waist loop is at waist height.
- The harness needs adjusting before remaining in place.
- Hold on to the buckle and pull parallel to the waist loop, this will adjust the webbing to your size.
- Do the same for both leg loops.
Tip: to know how tight the harness must fit – 1 finger should be able to squeeze in between the belt and you.
 English
  Tiếng Việt