How to Use an Auto belay
How To Use the AutoBelay?
- Before you start climbing, make sure you properly put on your harness and always double check!
- Open or unlock the Carabiner by Pushing, Twisting, and then Pulling the gate backward.
- Pull down the lanyard and remove the carabiner from its anchor.
- Clip it to the belay loop on your harness and double check if it’s locked.
- When you want to go back down, simply let go both of your hands and sit on the harness.
- When lowering to the ground, always face the wall and use your feet to walk down.
- When you reach the ground, return the carabiner back to its anchor point.
- You will have to repeat these steps every time, before and after a climb.
- It might seem challenging at first but with practice, it will become second nature.
Trust Us. The Auto belay is one of the best ways to simply learn climbing and have a good time.
CARABINER
Carabiners (called “Biner” for short)
The last piece of equipment you’ll need while using the Auto-Belay is auto-locking carabiners. Not to insult your intelligence, but they lock…automatically. You still always need to double-check anyway!
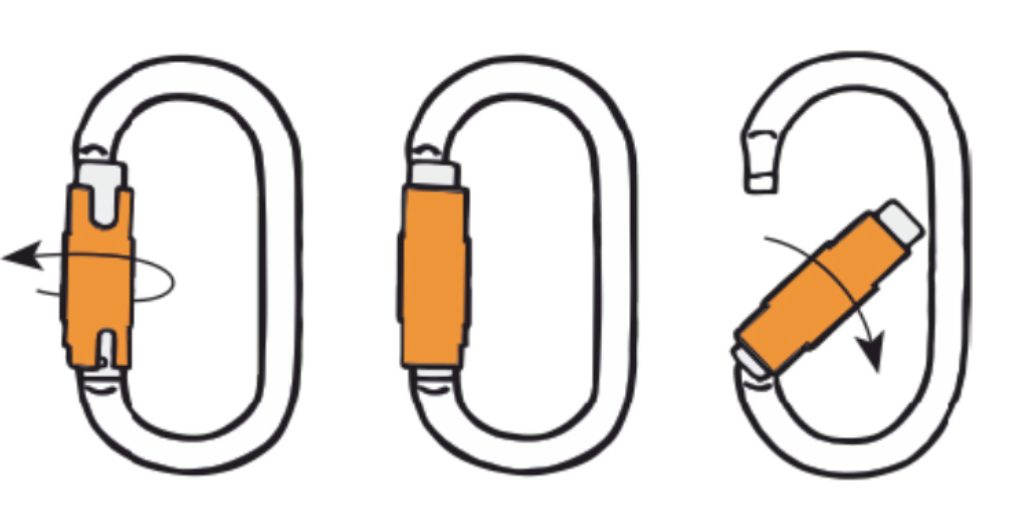
Just as seen in the pictures above, here’s how you unclip and clip auto-locking biners:
- Twist the gate and slide it up towards the larger part of the biner.
- Once unlocked, open the gate and attach the biner to your harness.
- Release the gate, and as always…double-check that it is really locked before climbing!
Rope Climbing Safety Checks
You’ll recall from the last section that we discussed how to check your harness to ensure that you are ready to safely climb. Here we add how to check the other two parts of your equipment.
You can remember the three things to check using the mnemonic “Ropes Catch Harnesses on the wall.” For each letter (R, C, H), you need to check two things.
- R = Rope
- Are you climbing on the correct wall?
- Is the Auto-belay lanyard straight (not twisted)?
- C = Carabiner
- Carabiner attached to the correct harness loop?
- Carabiner locked?
- H = Harness
- All three loops double-backed and snug?
- Hip belt above the hip bones?
Note: When you reach the top of the wall, or whenever you are ready to let go of the wall to come down, always look down at your harness to check that you are attached one more time. We hate to say it…but sometimes people forget to clip. Checking one more time is always the best practice!
Bouldering Safety Checks
While bouldering is free of harnesses, ropes, and carabiners to double-check, you have to remember that the falls are shorter and faster which means there is less room for error. Before you step on the wall, be sure to look around to make sure that the fall area is clear (no water bottles, chalk bags, people, etc. are below you).
Then, when you reach the top of a route, remember that you don’t have to jump from the top. Down climb a few holds to a comfortable height, and safely jump down. What does safely mean? Know how to fall!
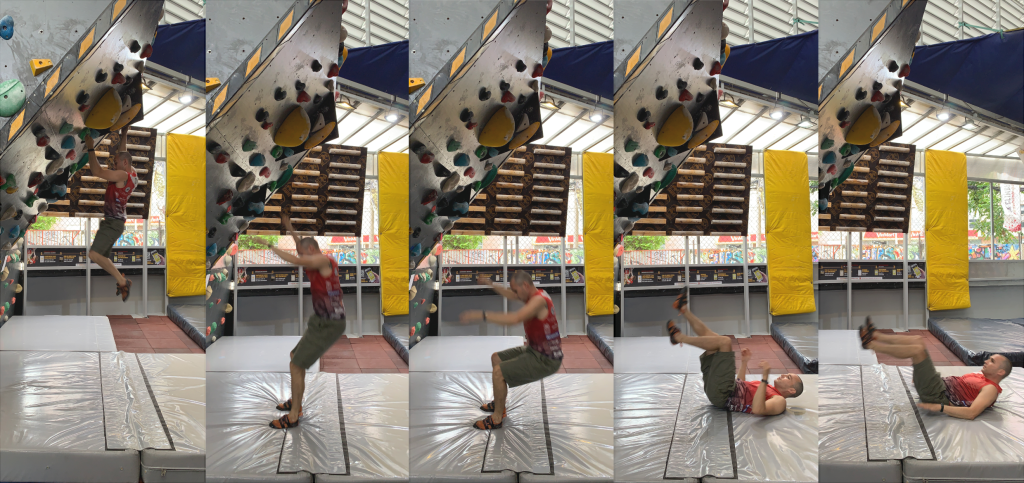
- Look where you will land before you let go of the wall.
- Keep your knees bent! (Locking your knees is the surest way to a climbing injury.)
- As you fall, cross your arms over your chest. (This keeps you from putting your hands down and taking the impact of your body weight with the small muscles and bones in your wrist.)
- And finally, when you land on your feet with your knees bent, roll backwards over one shoulder to avoid taking the impact of the fall in your neck.